
Blynk IoT App: Control IoT Projects with Mobile Easily
Introduction: Simplifying IoT App Development
In the world of IoT, the journey from blinking an LED to controlling complex devices via a smartphone can seem overwhelming—especially for beginners. But what if you could control your Arduino or ESP32 directly from your mobile without building a full-blown app from scratch?
That’s where the Blynk IoT App steps in. It bridges the gap between hardware and mobile interfaces, allowing hobbyists, students, and even professionals to prototype and deploy IoT solutions rapidly.
What is Blynk?
Blynk is a powerful IoT platform that enables you to control microcontrollers like Arduino, ESP32, and Raspberry Pi using a smartphone app. It’s both cloud-connected and hardware-agnostic, meaning you can connect any popular development board and monitor or control it via the internet.
Blynk consists of three core components:
- Blynk Mobile App (iOS & Android) – Interface to control your devices.
- Blynk Cloud – Secure cloud infrastructure for real-time data communication.
- Blynk Libraries – Embedded C++ libraries to add Blynk compatibility to your firmware.
In short: Blynk lets you design your IoT app without coding the frontend, while easily integrating with the hardware backend.

How Does Blynk Work?
The Blynk architecture is elegantly simple:
- Write firmware for your microcontroller using the Blynk libraries.
- Create a project in the Blynk mobile app.
- Connect widgets like buttons, sliders, charts to hardware pins.
- Upload code to your board (ESP8266, ESP32, Arduino, etc.).
- Control and monitor your project in real-time over Wi-Fi, LTE, or Ethernet.
Here’s a basic flow:
[Your IoT Board (Arduino/ESP32)]
        ↓ WiFi
  [Blynk Cloud Server]
        ↓ Internet
  [Blynk Mobile App Interface]
Features of Blynk IoT App
| Feature | Description |
|---|---|
| Drag & Drop UI | Use widgets like buttons, graphs, LCD, sliders, and maps. |
| Supports Popular Boards | Arduino, ESP8266, ESP32, NodeMCU, Raspberry Pi, etc. |
| Real-Time Communication | Get instant feedback and control with minimal latency. |
| Cloud Storage | Store data points for historical analysis. |
| Device Management | Manage, provision, and update multiple devices. |
| White-labeling | Build and publish your own IoT app using Blynk’s backend. |
Popular Widgets in Blynk Mobile App
Here are a few commonly used widgets to build interactive UIs:
- Button – Control GPIO output
- Slider – Send range values
- Graph – Plot real-time sensor data
- LCD – Show text or sensor readings
- LED – Display on/off status
- Joystick – Robot movement control
- Email / Notification – Alerts and notifications
These widgets are simple to configure and don’t require any frontend programming!
Setting Up Your First Blynk Project (Step-by-Step)
Step 1: Install the Blynk App
- Download from Google Play or App Store.
Step 2: Create a Free Account
- Sign up using email and password.
- Log into the Blynk app.
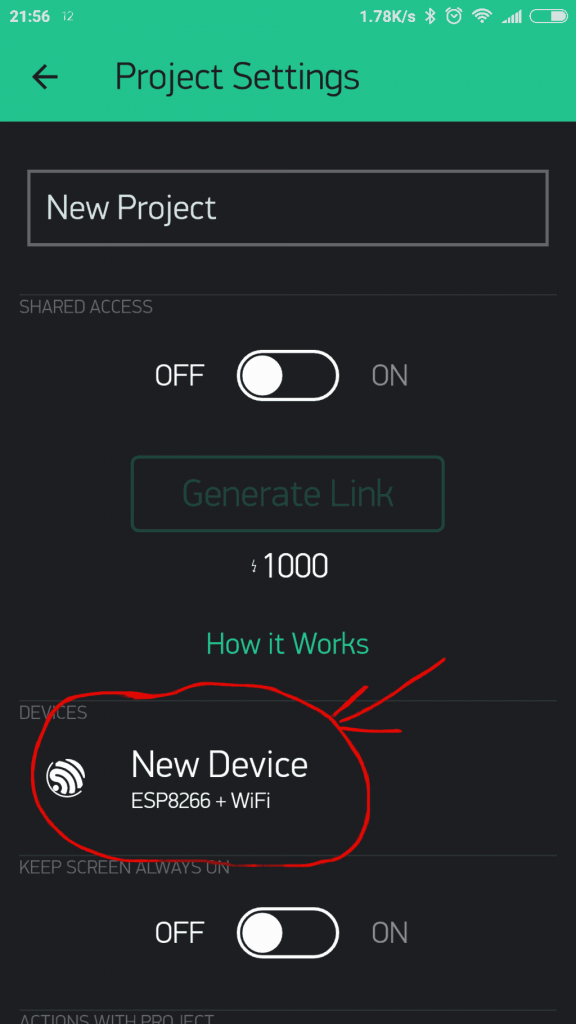
Step 3: Start a New Project
- Tap New Project → Enter name.
- Choose board: ESP32, Arduino UNO, NodeMCU, etc.
- Connection type: Wi-Fi.
- You will receive an Auth Token on email.
Step 4: Write Firmware Code
- Use Arduino IDE or PlatformIO.
- Install the Blynk Library.
- Paste Auth Token into code and configure WiFi credentials.
#include <WiFi.h>
#include <BlynkSimpleEsp32.h>

char auth[] = "YourAuthTokenHere";
char ssid[] = "YourWiFiName";
char pass[] = "YourWiFiPassword";

void setup()
{
  Blynk.begin(auth, ssid, pass);
}

void loop()
{
  Blynk.run();
}
Step 5: Upload and Run
- Connect ESP32 via USB.
- Upload the code using Arduino IDE.
- Open Blynk app → Press Play ▶️
You now have a live IoT dashboard!
Supported IoT Hardware Boards
| Board | Features | Why Use It |
|---|---|---|
| ESP32 | Wi-Fi + Bluetooth, fast, low-cost | Best overall board |
| ESP8266/NodeMCU | Wi-Fi only, great for beginners | Lightweight & easy |
| Arduino UNO + ESP Shield | Classic combo | Good for learning basics |
| Raspberry Pi | Full Linux OS | Suitable for advanced projects |
Blynk supports over 400 hardware models via the Arduino and Python libraries.
3 steps to getting started with Blynk:
Step 1. DOWNLOAD BLYNK APP FOR ANDROID OR iOS
Step 2. INSTALL BLYNK LIBRARY
You can download blynk library for Arduino from above. Download the zip file and unzip it to the library folder of Arduino IDE (C:\Program Files\Arduino\libraries) if you are unable to find this folder follow this guide.
Step 3. BUILD YOUR FIRST APP
- Open Blynk IoT App on your smart phone and create new account and then new project after successfully login.


Give name to it
- Choose the hardware and communication type you are going to use click here to check list of supported devices

- Obtain Auth Token:
For obtaining token follow following steps:
a) Select the device for communication:
b) Click on device

c)See the Auth Token

d) Press create button

- Add the Button widget. Tap once to get to Widget Settings

You can hold and drag it to reposition

- In Widget Settings set the PIN you want to control (e.g. if your LED is connected to pin 7 – choose pin D7): Each Widget has its own settings. Tap on the widget to get to them.

- Run the project

Blynk.Cloud – A Free Cloud for Your Projects
The Blynk IoT platform includes free access to their secure cloud, which:
- Routes data between app ↔ hardware.
- Stores virtual pin states.
- Handles multiple devices.
- Supports OTA updates.
You can also host your own private Blynk server for enterprise control.
Security & Authentication
Blynk ensures data security via:
- SSL/TLS encryption.
- Per-device Auth Tokens.
- Role-based user access.
- Cloud-side logic rules.
Real-Life Use Cases of Blynk App
| Project | Hardware | Blynk Role |
|---|---|---|
| Home Automation | ESP8266 | Control lights, fans via app |
| Smart Plant Monitor | ESP32 + Soil Sensor | Monitor soil moisture & send alerts |
| Security Camera | Raspberry Pi | View camera via Blynk interface |
| Water Level Detector | Arduino UNO + Ultrasonic | Alerts on app when water tank is full |
| Smart Door Lock | ESP32 + Servo + RFID | Unlock door from app securely |
Integrating Blynk with Other Platforms
Blynk can work with:
- IFTTT
- Google Assistant
- Alexa
- MQTT (via bridges)
- REST APIs
This makes it suitable for both hobby and commercial automation projects.
Why Blynk is Ideal for Beginners & Experts
| For Beginners | For Experts |
|---|---|
| No frontend coding | Fast prototyping |
| Instant feedback | REST API support |
| Free widgets | White-labeling options |
| Massive documentation | Custom event logic |
Blynk 2.0 vs Classic Blynk
In 2025, Blynk 2.0 offers:
- Device provisioning
- Data analytics
- Dashboard templates
- User & organization management
- Full drag-and-drop mobile + web interface
It’s highly scalable and ideal for startups and commercial deployments.
Resources & Downloads
FAQs: Blynk IoT App
Q1. Is Blynk free to use?
Yes! Blynk offers a free tier for hobbyists with generous limits. Paid plans are available for pro and enterprise users.
Q2. Can I use Blynk without internet?
No, Blynk requires internet or local server for full functionality.
Q3. Does Blynk work with ESP32?
Absolutely! Blynk works smoothly with ESP32 and supports all its features.
Q4. How can I publish my own IoT app with Blynk?
Use Blynk’s white-labeling service to build and publish your branded IoT mobile application.
Q5. Is Blynk secure?
Yes, Blynk uses industry-standard encryption and secure authentication methods.
Conclusion: Should You Use Blynk for Your Next IoT Project?
If you’re looking to save time, avoid complex app development, and get straight to building IoT projects with an elegant mobile interface, Blynk is your best companion.
Whether you’re a student building a home automation system or a startup prototyping a commercial product, Blynk helps you launch in minutes—not months.
Ready to Explore More? Let’s Build Smarter Together!
🔔 Subscribe to Our YouTube Channel » for IoT video Tutorials.
🌐 Start Learning IoT Basics Now » and What is IoT? – Introduction to IoT and IoT Architecture: 4 Essential IoT Layers Simplified for Beginners on IoTDunia.com! and Check out Top IoT Applications in Real World – Smart Use Cases 2025, IoT career guide 2025, Best Projects on IoT for Beginners
👉 Have questions? Drop them in the comments!
💡 Start small, stay curious, and make your world smarter—one device at a time.