
Temperature Humidity measurement Project
Introduction:
Temperature and Humidity are common parameters to be measured. In this project we are going to measure temperature and humidity by using Arduino UNO and DHT11.
Project Requirements:
- Arduino UNO
- DHT 11 Sensor
- Connecting wires
See also: Getting Started with Arduino, Arduino IDE software
Arduino UNO:

Image credit: UNO
Detail Information about Arduino UNO is in below link
What is Arduino UNO Board? -Board for Rapid Prototyping
DHT11:

DHT11 is Temperature and Humidity Sensor with calibrated digital signal output. It has high degree reliability and excellent long-term stability.
This sensor includes a resistive type humidity measurement component with an NTC type temperature measurement component .
It has 8 bit microcontroller which provide 40 bit of output over SPI interface. For more details about DHT11 you can download datasheet from here.
Image credit: DHT 11 Temperature Humidity Sensor(D-Robotics UK)
Specification:
- Supply Voltage: 3 – 5.5 V
- Temperature range :0-50 ° ± 2 °C
- Humidity :20-90% RH ± 5% RH
- Interface: Digital
What is Relative Humidity?
The DHT11 measures temperature and relative humidity (RH).
Relative humidity is the ratio of water vapor in air and the saturation point of water vapor in air which changes with temperature Relative Humidity can be calculated as is as follows:
Relative Humidity = (density of water vapor / density of water vapor at saturation) x 100%
Interfacing DHT11 with Arduino UNO:

Connect DHT11 to Arduino UNO,
Vcc — 5v ,
GND — GND,
Data Pin — any of the Digital I/O Pin of Arduino.
Writing program :
Before using DHT11 with Arduino UNO you should have Arduino IDE installed on your PC, if don’t have you should download from here and install it.
Now download DHT11 library for Arduino IDE from here. Then add this library to Arduino library folder (C:\Program Files\Arduino\lib) manually or go to Sketch>Include Library>Add Library and select the DHTLib.zip file you have downloaded.
Upload the following code:
#include<dht.h>
dht DHT;
#define DHT11_PIN 3 // digital i/o pin no to which DHT11 data pin is connected
void setup()
{
Serial.begin(9600);
}
void loop()
{
intchk = DHT.read11(DHT11_PIN);
Serial.print(” Humidity: ” );
Serial.print(DHT.humidity); //read humidity
Serial.print(“%\t”);
Serial.print(” Temparature: “); //read temperature
Serial.print(DHT.temperature);
Serial.print(“0c\n”);
delay(1000);
}
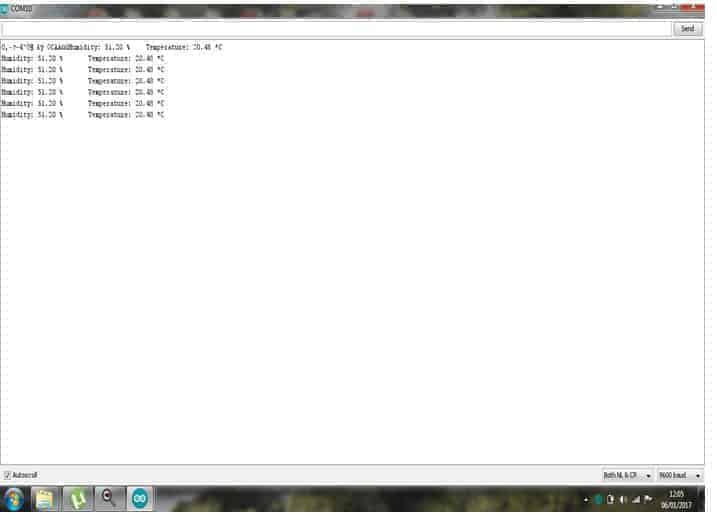
Result for Temperature Humidity measurement :
Press serial monitor button to view temperature and humidity value.
See also: WEATHER STATION – IoT Project using NodeMCU
Let us know what you think about Temperature and Humidity Measurement in the comment section below.
If you like this post subscribe to our YouTube Channel for IoT video Tutorials.
and If you have smart product or service and looking for perfect audience then submit a guest post at IoTDunia and get to know in IoT world.